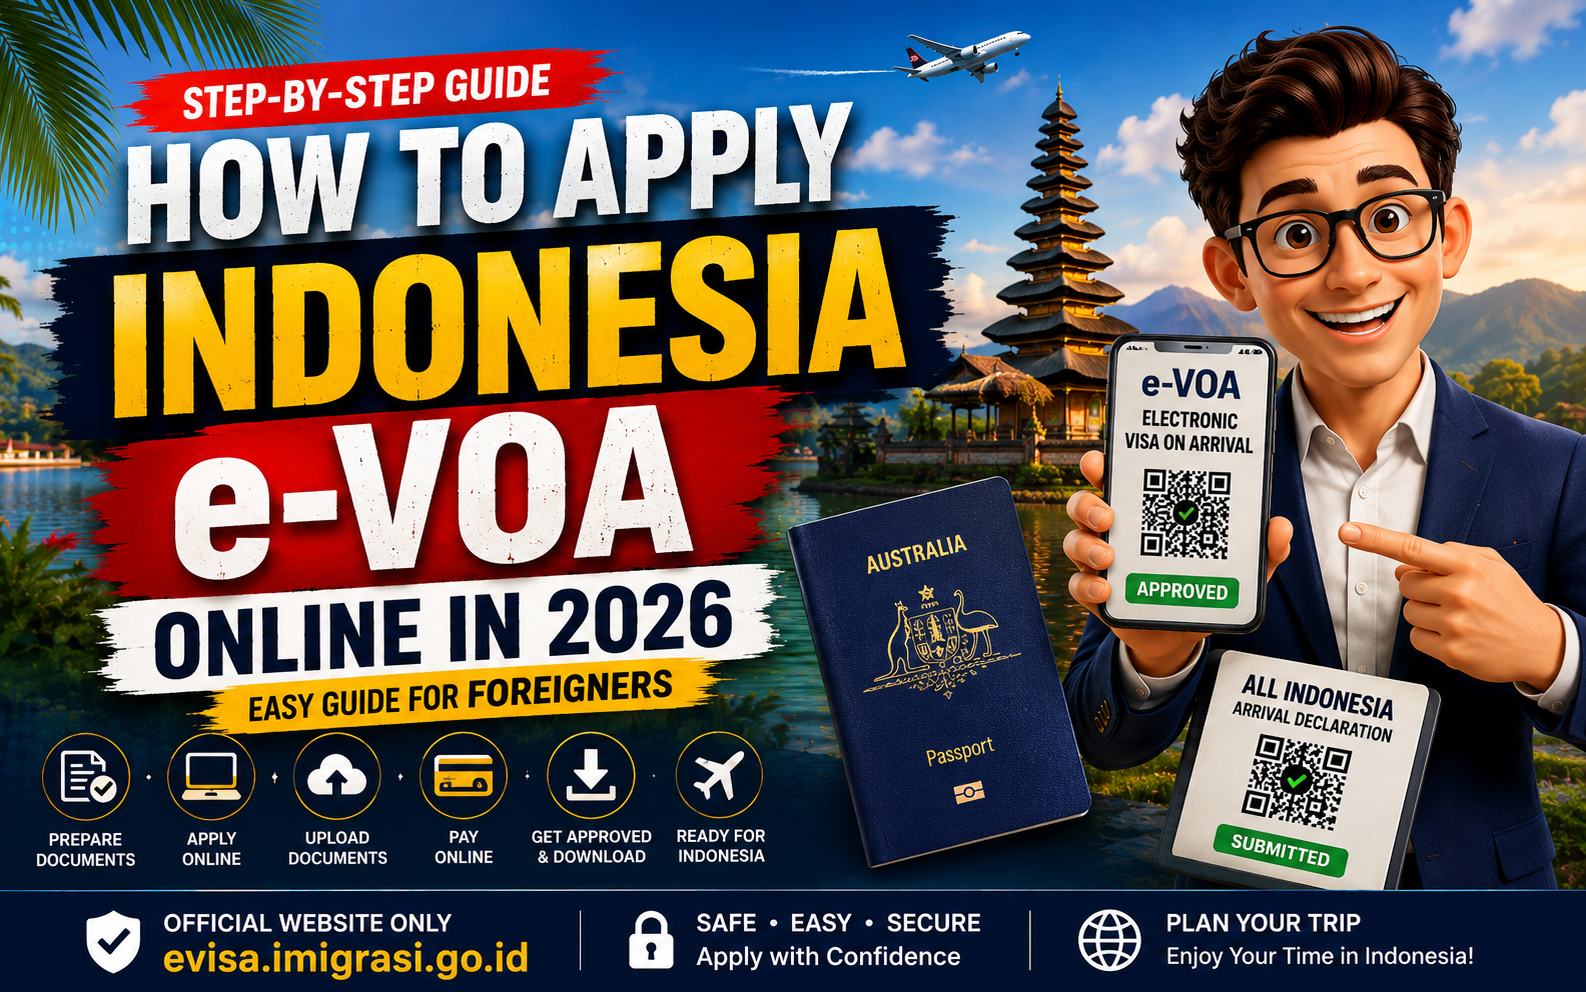
Planning to visit Indonesia or Bali in 2026? If your passport is eligible for an Indonesia e-VOA, you can apply for your visa online before travelling.
This simple step-by-step guide explains how to apply for Indonesia e-VOA online, from preparing your documents and completing the application to downloading your approved e-VOA and preparing for arrival in Indonesia.
You will also learn what to do before your flight, including the separate All Indonesia arrival declaration, so you can prepare your travel documents in the right order.
In this guide, we will cover:
- What documents to prepare before applying;
- How to apply for Indonesia e-VOA through the official website;
- How to enter your passport and travel details correctly;
- How to upload your documents and make the online payment;
- What to do after your e-VOA is approved;
- How to complete All Indonesia before travelling;
- What to prepare when arriving in Indonesia;
- What options may be available if you later want to stay longer.
“Let’s start with the documents you need before applying.”
Before You Start: Prepare These Documents
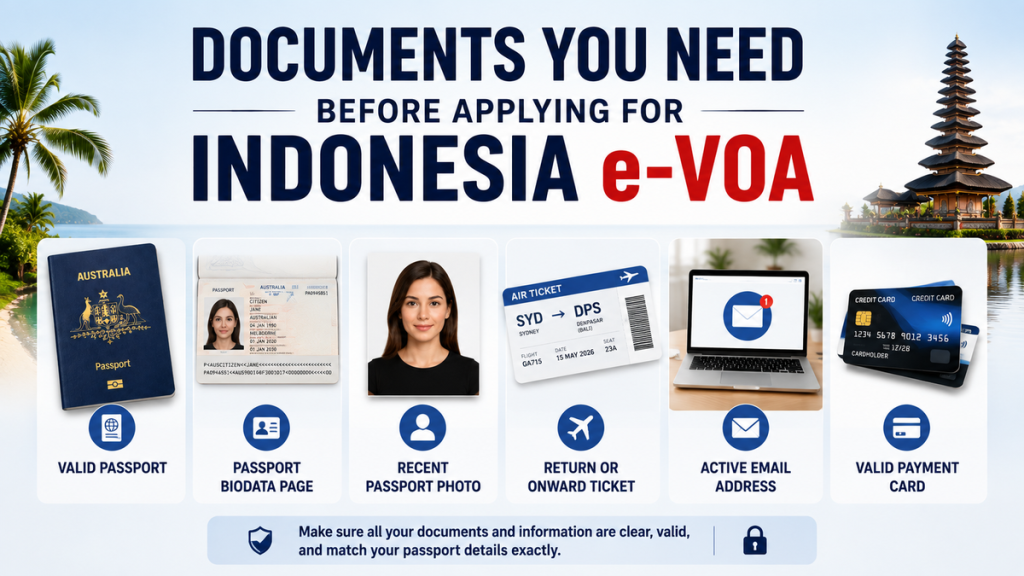
Before you begin your Indonesia e-VOA application, prepare the required documents first. Having everything ready will make the online process faster and help you avoid mistakes.
You should prepare:
- A valid passport with sufficient validity for your trip to Indonesia;
- A clear copy of your passport biodata page;
- A recent passport photograph;
- A return or onward ticket;
- An active email address to receive information about your application;
- A valid payment card for the online visa payment.
Make sure your passport details, uploaded documents, and application information are clear and accurate. Your name, passport number, nationality, and other personal details should match your passport exactly.
“Once everything is ready, you can begin your application through the official Indonesia eVisa website.”
Step 1: Visit the Official Indonesia eVisa Website
To start your Indonesia e-VOA application, visit the official Indonesian Immigration eVisa website only:
evisa.imigrasi.go.id
This is the official Indonesian Immigration portal for the current eVisa application process, including the Electronic Visa on Arrival (e-VOA). The official Immigration SOP for e-VOA applications also refers to the e-Visa Website as the platform used to submit the application, upload the required documents, and complete the payment process.
Important: Be Careful of Fake e-VOA Websites and Online Scams
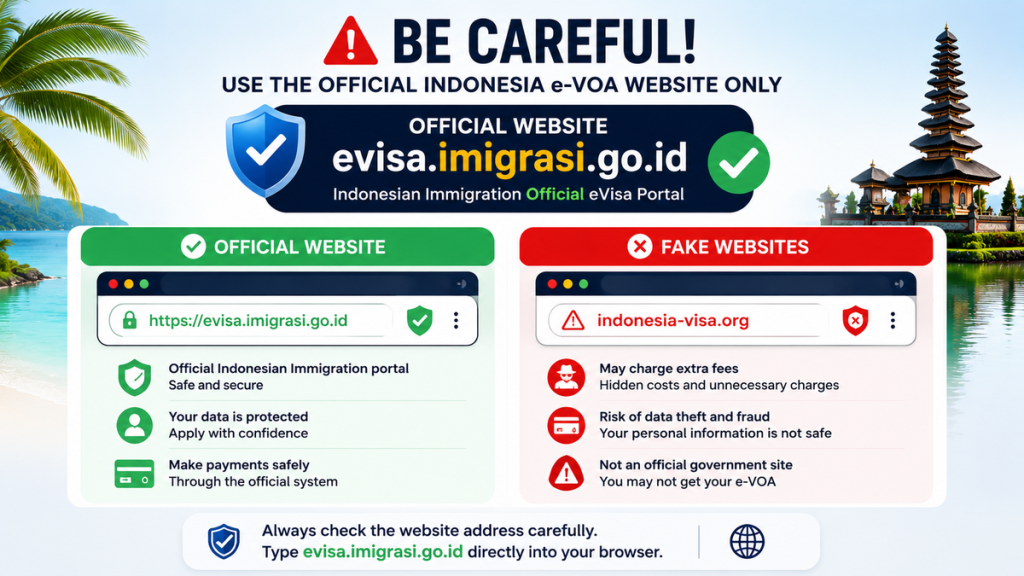
There are many websites online that may look official and claim to offer an Indonesia e-VOA, Bali e-VOA, or Indonesia Visa on Arrival service. Some may appear in search engine results and can charge additional fees or, in more serious cases, be part of a scam.
Indonesian Immigration has previously issued an official warning about fake websites impersonating the e-VOA service and has also warned about fraudulent websites that imitate official Immigration services.
Before entering your passport details or making any payment, always check the website address carefully.
For your safety, make sure the website domain is:
Do not assume that a website is official simply because it appears at the top of Google search results or uses words such as “Indonesia Visa,” “e-VOA,” “Bali Visa,” or “Immigration.”
The safest option is to type the official website address directly into your browser:
evisa.imigrasi.go.id Once you are on the official website, you can continue to the next step and begin your Indonesia e-VOA application.
Step 2: Choose Indonesia e-VOA and Enter Your Details
Once you are on the official evisa.imigrasi.go.id website, start your application and choose the appropriate Electronic Visa on Arrival (e-VOA) option for your travel purpose.
For most eligible foreign tourists visiting Indonesia for tourism, the relevant category is the B1 e-VOA. However, always check the visa description and requirements shown in the official system before continuing.
You will then be asked to enter your personal and passport information. Fill in every detail exactly as it appears on your passport.
This may include:
- Full name;
- Nationality;
- Date of birth;
- Passport number;
- Passport expiry date;
- Email address and other contact details.
Important: Do Not Guess or Use Different Information
Take your time and check every detail carefully before moving to the next step. Even a small mistake in your name, passport number, date of birth, or passport expiry date can cause problems with your application.
Your e-VOA information should match your passport exactly. If you have two names, multiple given names, or a middle name, follow the information exactly as shown in the passport.
After entering and checking your personal information, continue to the next step: uploading your required documents.
Step 3: Upload Your Required Documents
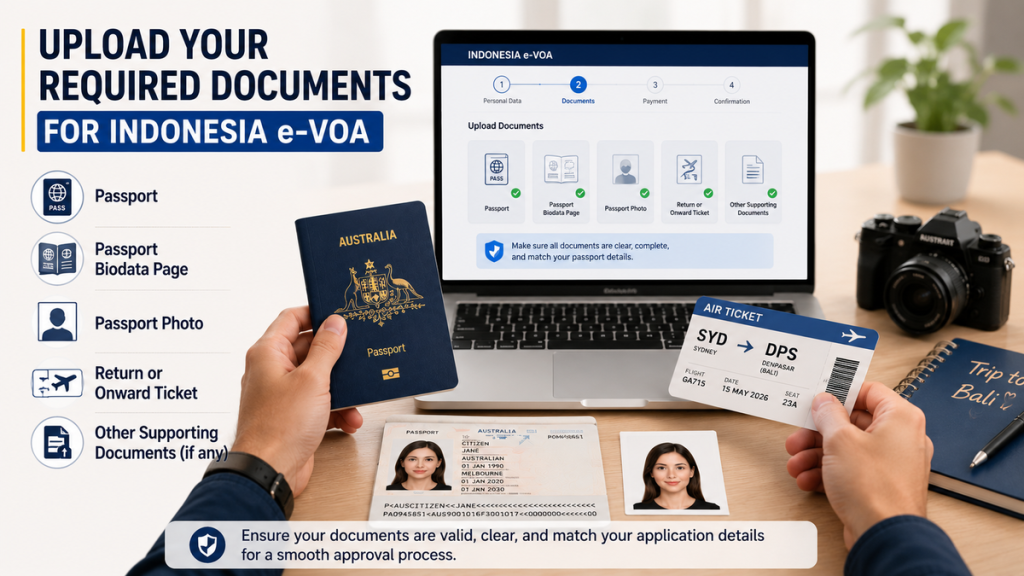
After entering your personal and passport details, the next step is to upload the documents required for your Indonesia e-VOA application.
Prepare clear digital copies of the documents requested by the official eVisa system. For a standard e-VOA application, these may include:
- Your passport biodata page;
- A recent passport photograph;
- Your return or onward ticket.
Make Sure Your Documents Are Clear
Before uploading, check that every document is:
- Clear and easy to read;
- Complete, with no important information cut off;
- Uploaded in the correct orientation;
- The correct document for the applicant;
- Consistent with the information entered in your application.
Your passport biodata page should clearly show your full name, passport number, nationality, date of birth, and passport validity.
Important: Check Your Files Before Continuing
Do not rush through the upload process. An unclear, incomplete, or incorrect document can cause problems with your application.
After uploading the required documents, check the preview carefully. Make sure you have uploaded your own passport and documents, especially if you are applying for more than one person or helping family members complete their applications.
Once all required documents have been uploaded correctly, continue to the next step: entering your travel information.
Step 4: Enter Your Travel Information
After uploading your required documents, continue to the travel information section.
The official eVisa system may ask you to provide details about your planned trip and stay in Indonesia. Enter the information requested carefully and make sure it is consistent with your travel plans.
Depending on the application form, you may need to provide information such as:
- Your planned date of arrival;
- Your intended port or airport of entry;
- Your accommodation details in Indonesia;
- Your hotel, villa, or residential address;
- Your province or city of stay;
- Other travel information requested by the system.
Use Your Actual Travel Information
Try to enter information that reflects your genuine travel plans. For example, if you are staying in a hotel or villa, use the correct accommodation details available at the time of your application.
Before continuing, check your travel information one more time. Make sure important details, such as your planned arrival date and accommodation information, have been entered correctly.
Once you have completed your travel details, you can continue to the next step: reviewing your entire application before making the payment.
Step 5: Review Everything and Pay Online
Before making the payment, take a few minutes to review your entire Indonesia e-VOA application carefully.
This is one of the most important steps because your personal and passport information should be entered correctly before you complete the payment.
Check the following details:
- Your full name matches your passport;
- Your passport number is correct;
- Your nationality and date of birth are correct;
- Your passport expiry date is correct;
- Your email address is entered correctly;
- Your uploaded documents are clear and correct;
- Your travel and accommodation information is accurate.
Important: Check Everything Before You Pay
Do not rush to the payment page. Carefully review all information first.
If you notice a mistake, correct it before completing the payment whenever the system allows you to do so. A mistake in important information such as your passport number or name can create problems with your e-VOA application.
For the standard B1 Indonesia e-VOA, the official government visa fee is IDR 500,000. Any additional fee charged by a visa agency or service provider is separate from the official government visa fee.
Once you have confirmed that all information is correct, continue to the official online payment process and follow the instructions shown by the system.
Keep Your Payment Confirmation
After completing the payment, save any payment confirmation or reference number provided by the system.
You can then wait for your application to be processed. Once your Indonesia e-VOA is approved, the next step is to receive and download your e-VOA before travelling to Indonesia.
Step 6: Receive and Download Your Approved e-VOA
After completing your application and payment, wait for the application to be processed through the Indonesian Immigration system.
If your application is approved, you will receive your Indonesia e-VOA electronically. Once available, download the approved e-VOA and check all of the information carefully.
Make sure the following details match your passport:
- Full name;
- Passport number;
- Nationality;
- Date of birth;
- Passport validity;
- Visa details.
Save a Copy Before You Travel
Keep your approved e-VOA in more than one place, for example:
- Save a digital copy on your phone;
- Keep a copy in your email;
- Download the PDF to your device;
- Print a copy if you prefer to carry one.
Having an offline copy can be useful if you cannot access the internet when you arrive.
Check Your e-VOA One Final Time
Before your flight, open your approved e-VOA and compare the important information with your physical passport.
If you find an important error, do not ignore it. Check the available options through the official Indonesian Immigration system before travelling.
Once your e-VOA is ready, remember that there is one more important step before travelling to Indonesia: completing the All Indonesia arrival declaration.
Before Flying: Complete All Indonesia
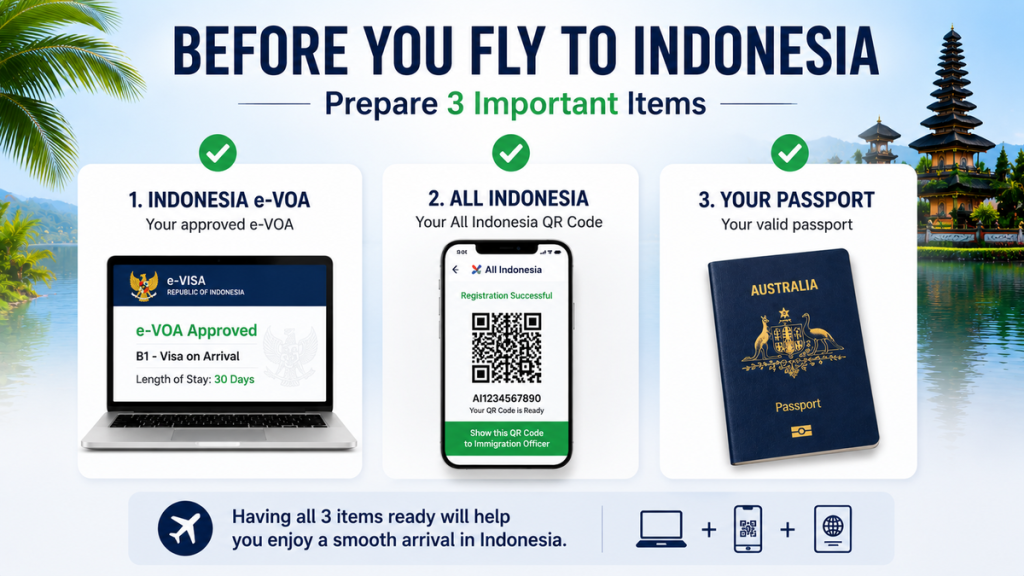
Before travelling to Indonesia, make sure you also complete the All Indonesia arrival declaration.
Important: Your e-VOA and All Indonesia Are Two Different Things
Your Indonesia e-VOA is your electronic visa or visa-on-arrival permission.
All Indonesia is a separate integrated arrival declaration system for passengers entering Indonesia.
This means that having an approved e-VOA does not automatically mean that you have completed All Indonesia. If All Indonesia is required for your journey, you should complete it separately before travelling.
Complete All Indonesia Before Your Trip
Prepare the information requested by the official All Indonesia system and complete your arrival declaration within the applicable submission period before arriving in Indonesia.
The system may ask for information related to your:
- Personal details;
- Passport and travel information;
- Flight details;
- Accommodation in Indonesia;
- Other arrival declarations required by the system.
After completing the declaration, save the QR code or confirmation provided by the official system and keep it available on your phone.
Keep Your Travel Documents Ready
Before leaving for the airport, make sure you have:
- Your valid passport;
- Your approved Indonesia e-VOA;
- Your return or onward ticket;
- Your accommodation details;
- Your completed All Indonesia confirmation or QR code, where applicable.
With your e-VOA and arrival documents prepared, you are ready for the next step: arriving in Indonesia and proceeding through immigration.
What Happens When You Arrive in Indonesia?
Once you arrive in Indonesia, prepare your travel documents before proceeding through the arrival process.
Keep the following documents and information easily available:
- Your valid passport;
- Your approved Indonesia e-VOA;
- Your All Indonesia confirmation or QR code, where applicable;
- Your return or onward ticket, if requested;
- Your accommodation information, if requested.
Proceed to the immigration area and follow the instructions from Indonesian Immigration Officers.
Having an approved e-VOA can help you prepare your visa arrangements before your flight, but you should still carry your valid passport and other relevant travel documents. Immigration Officers may request supporting information or documents as part of the arrival and immigration process.
Important: An e-VOA Does Not Guarantee Entry
Your approved Indonesia e-VOA allows you to travel to Indonesia under the relevant visa conditions, but the final decision on entry remains with the Immigration Officer at the point of entry.
For this reason, always make sure your passport is valid, your e-VOA information is correct, and your travel documents are ready before you travel.
After arriving successfully, you can enjoy your stay in Indonesia according to the conditions and permitted period of stay shown on your immigration permission.
Can I Stay Longer or Change to Another Indonesian Stay Permit?
If you later decide that you would like to stay in Indonesia for longer, other immigration options may be available depending on your purpose of stay and eligibility. If you are still deciding which tourist visa is right for your trip, compare the main tourist visa options in Indonesia before applying.
For example, some visitors may be eligible to extend their permitted stay, while others may need to apply for a different visa or stay permit for purposes such as working, investing, joining family, retirement, or other long-term activities.
In certain situations, it may also be possible to transition from your current immigration status toward another stay permit through the applicable Indonesian Immigration process. However, the available option and procedure will depend on your individual situation and the immigration rules in force at the time.
We will explain these Indonesia long-term visa and stay permit options in separate guides, including e-VOA extensions, bridging options, ITAS/KITAS, and other long-term immigration pathways.
Need Help Applying for an Indonesia e-VOA?
Applying for an Indonesia e-VOA can be straightforward when you use the official Indonesian Immigration website and prepare your documents carefully. However, if you are unsure about your eligibility, have questions about the application process, or need help choosing the right visa for your plans in Indonesia, professional assistance can make the process easier.
Azra Solutions can assist foreign nationals with a wide range of Indonesian immigration services, including:
- Indonesia visa consultation;
- e-VOA application assistance;
- Visa extensions;
- Long-term visa options;
- ITAS/KITAS;
- ITAP;
- Investor and business-related immigration;
- Other Indonesian immigration services.
If you need assistance with your Indonesia visa or stay permit, contact Azra Solutions to discuss the immigration option that best matches your purpose of stay in Indonesia.